Pearl Harbor
Overview
Pearl Harbor Japs
forces
Pearl Harbor Japs
Aircraft
Coral Sea
Doolitle Attack
Guadalcanal
Japan Capitulates
Battleship Bismarck
Normandy Invasion
USN Admirals
Japan Admirals
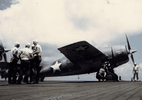
Torpedo Bombers
USN WW2 Fighters
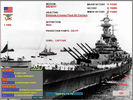
USN WW2 Battleships
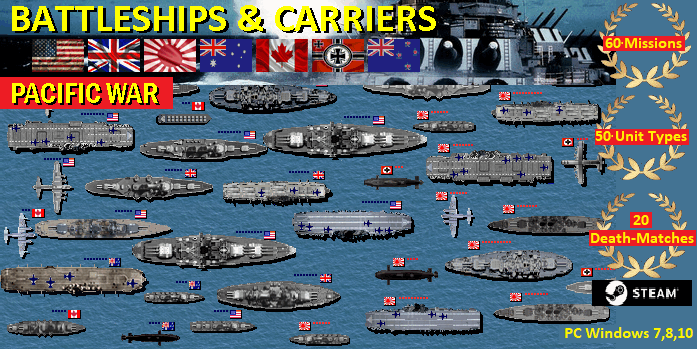
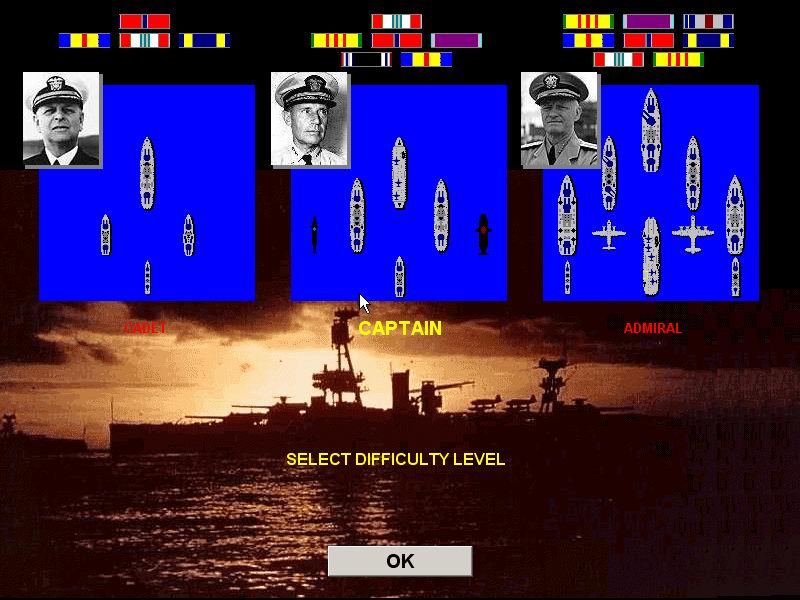
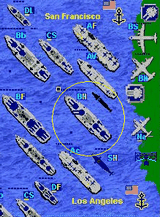
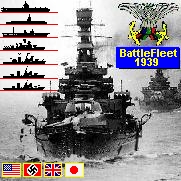
BATTLESHIP
GAME
World War 2 Edition
 |
Battleship Game
World War 2

|
www.battle-fleet.com
Battleship Game - WW2 Naval Strategy: the best
choice among aircraft carrier games, cruiser
games and submarine games.
Battleship game: missions and scenarios:
Pearl Harbor Game
Atlantic Game 1943
Sink Cruisers Game
Midway Game
Iwo Jima Game
US Marines Game
Luftwaffe Game Pacific
Torpedo Game Boats
Bismarck Game Pacific
Destroy RAF Game
Okinawa
US Navy Submarine Game
Fleet Submarines Game
Kamikaze Game
U Boat Game
Singapore Game
Swordfish Hunt
Patrol Boats
Air Supremacy
Alert
Battleships Game
Java
Defense
Fleet Cruisers Game
Atlantic Island
Coral Sea Game
Iron Sea
Mykonos
Imperial Ocean
Long Convoy
Skagerrak
Target Los Angeles
West Pacific Game
Pacific War Game
Leyte Transport
Emperor Hirohito
Normandy Game
South Pacific Game
Destroy USAF Game
Submarine Games
US Navy Game
Free Hunt Doenitz Game
Free Hunt Spruance Game
Free Hunt Halsey Game
Imperial Navy I
Royal Navy Game
Free Hunt Pearl Harbor Games
Midway II
Kriegsmarine I
Brisbane Convoy
Clear West Coast
Fall Of Australia
Battle For Leyte
Conquer Of Japan
HMAS Perth
Road To Okinawa
Orange Ports
Emperor Defense
Prince Of Wales
San Bernardino
Pacific Race
Heavy Duty
TokiExpress
Operation Sidney
Bomber Operation
Conquer Of Italy
Heavy Cruiser Game
Frigate Hunt
Santa Cruz
Lamansh Game
Azores Transport
Norway Convoy
Invasion
Grossadmiral
Norway Ports
Drang Nach Ost
Convoy Pk30
Ciano Defense
Sir John Tovey
Free Hunt Andrews
Germans On Pacific
Silent Hunt
Antigua
Return To Midway Game
Kriegsmarine Game II
Royal Air Force Game
F. Hunt Lancaster
Jamamoto Game
Free Hunt USN
Free Hunt Japan
Free Hunt RAAF
Free Hunt U Boat Game
Free Hunt Aircraft Carriers Game
Free Hunt Hawaii
Free Hunt Yamato Game
Free Hunt Iwo Jima Game
Free Hunt Pacific Game
Free Hunt Torpedos
Free Hunt Convoy
Free Hunt Germany
Free Hunt Germany II
Free Hunt Italy
Free Hunt Malaya
Free Hunt Subs Game
Free Hunt B-29 Game
Free Hunt USN 1944
Devil Island
Dragoon Carriers
|
|
Battle of Midway, 4-7 June 1942 WW2
Battle of Midway |
|
Midway |
|
Midway Battle |
|
Midway Carriers |
The Battle of Midway or Midway
Game, fought over and near the tiny U.S. mid-Pacific
base at Midway atoll, represents the strategic high water
mark of Japan's Pacific Ocean war. Prior to this action,
Japan possessed general naval superiority over the United
States and could usually choose where and when to attack.
After Midway, the two opposing fleets were essentially
equals, and the United States soon took the offensive.
Japanese Combined Fleet commander Yamamoto moved on
Midway in an effort to draw out and destroy the U.S.
Pacific Fleet's aircraft carrier striking forces, which
had embarassed the Japanese Navy in the mid-April
Doolitle Raid on Japan's home islands and at the Battle
of Coral Sea in early May. He planned to quickly knock
down Midway's defenses, follow up with an invasion of the
atoll's two small islands and establish a Japanese air
base there. He expected the U.S. carriers to come out and
fight, but to arrive too late to save Midway and in
insufficient strength to avoid defeat by his own
well-tested carrier air power.
Yamamoto's intended surprise was thwarted by superior
American communications intelligence, which deduced his
scheme well before battle was joined. This allowed
Admiral Chester W. Nimitz, the U.S. Pacific Fleet
commander, to establish an ambush by having his carriers
ready and waiting for the Japanese. On 4 June 1942, in
the second of the Pacific War's great carrier battles,
the trap was sprung. The perserverance, sacrifice and
skill of U.S. Navy aviators, plus a great deal of good
luck on the American side, cost Japan four irreplaceable
fleet carriers, while only one of the three U.S. carriers
present was lost. The base at Midway, though damaged by
Japanese air attack, remained operational and later
became a vital component in the American trans-Pacific
offensive.
| CIA / KGB intelligence game. Run your own operation game.
Travel around the world and set up espionage
game, trade with state secrets, weapon systems,
spy codes, WMD, hire secretaries, agents, lawyers
and soldiers, establish secret agent stations,
cells and bases and search for criminals and
politicians. Involve in agent game. Game contains
more than 40 missions including Nuclear Game,
Cold War Game, Secret Agent, CIA Games, USAF,
Prime Minister, RAF, Bin Laden, Sadam, KGB,
Operations Iran… |
|
At 0430 in the morning of 4 June
1942, while 240 miles northwest of Midway, Vice Admiral
Chuichi Nagumo's four carriers began launching 108 planes
to attack the U.S. base there. Unknown to the Japanese,
three U.S. carriers were steaming 215 miles to the east.
The two opposing fleets sent out search planes, the
Americans to locate an enemy they knew was there and the
Japanese as a matter of operational prudence. Seaplanes
from Midway were also patrolling along the expected enemy
course. One of these spotted, and reported, the Japanese
carrier striking force at about 0530.
That seaplane also reported the incoming Japanese planes,
and radar confirmed the approaching attack shortly
thereafter. Midway launched its own planes. Navy, Marine
and Army bombers headed off to attack the Japanese fleet.
Midway's Marine Corps Fighting Squadron 221 (VMF-221)
intercepted the enemy formation at about 0615. However,
the Marines were immediately engaged by an overwhelming
force of the very superior Japanese "Zero"
fighters and were able to shoot down only a few of the
enemy bombers, while suffering great losses themselves.
The Japanese planes hit Midway's
two inhabited islands at 0630. Twenty minutes of bombing
and straffing knocked out some facilities on Eastern
Island, but did not disable the airfield there. Sand
Island's oil tanks, seaplane hangar and other buildings
were set afire or otherwise damaged. As the Japanese flew
back toward their carriers the attack commander,
Lieutenant Joichi Tomonaga, radioed ahead that another
air strike was required to adequately soften up Midway's
defenses for invasion.
While their aviators flew back from
Midway, the Japanese carriers received several
counterstrikes from Midway's own planes. Faced with
overwhelming fighter opposition, these uncoordinated
efforts suffered severe losses and hit nothing but sea
water. Shortly after 0700, torpedo attacks were made by
six Navy TBF-1s and four Army Air Force B-26s. Between
0755 and 0820, two groups of Marine Corps bombers and a
formation of Army B-17s came in. The only positive
results were photographs of three Japanese carriers taken
by the high-flying B-17s, the sole surviving photos of
the day's attacks on the Japanese carriers.
Meanwhile, a tardy Japanese scout
plane had spotted the U.S. fleet and, just as Midway's
counterattacks were ending, reported the presence of a
carrier. Japanese commander Vice Admiral Chuichi Nagumo
had begun rearming his second group of planes for another
strike on Midway. He now had to reorganize that, recover
the planes returning from Midway and respot his flight
decks to launch an attack on the U.S. ships. Nagumo's
force barely missed having enough time.
In the hour after about 0930, U.S.
Navy planes from the carriers Hornet (CV-8), Enterprise
(CV-6) and Yorktown made a series of attacks,
initially by three squadrons of TBD torpedo planes that,
despite nearly total losses, made no hits. The sacrifice
of the TBDs did slow Japanese preparations for their own
strike and disorganized the defending fighters. Then, at
about 1025, everything changed. Three squadrons of SBD
scout bombers, two from Enterprise and one from Yorktown,
almost simultaneously dove on three of the four Japanese
carriers, whose decks were crowded with fully armed and
fueled planes that were just starting to take off. In a
few minutes, akagi, Kaga and Soryu were ablaze and out of
action.
Of the once-overwhelming Japanese
carrier force, only Hiryu remained operational. A few
hours later, her planes crippled USS Yorktown. By
the end of the day, though, U.S. carrier planes found and
bombed Hiryu. Deprived of useful air cover, and
after several hours of shocked indecision, Combined Fleet
commander Admiral Isoroku Yamamoto called off the Midway
operation and retreated. Six months after it began, the
great Japanese Pacific War offensive was over.
U.S. Pacific Fleet ORDER OF BATTLE Midway
U.S. Pacific Fleet and
Pacific Ocean Areas
Adm. Chester W. Nimitz, Commander in Chief
- CARRIER STRIKING FORCE
-- RADM Frank Jack Fletcher
- Task Force 17 --
Admiral Fletcher
- TG 17.5
Carrier Group -- Capt. Elliot
Buckmaster
- Yorktown(CV)
-- Capt. Buckmaster
- VF-3
-- 25 F4F-4
- VB-3
-- 18 SBD-3
- VS-3
-- 19 SBD-3
- VT-3
-- 13 TBD-1
- TG 17.2 Cruiser Group
--RADM William Smith
- TG 17.4 Destroyer
Squadron -Capt. Gibert C. Hoover
(ComDesRon 2)
- 6 DDs (1
Joined on June 1)
- Task Force 16 -- RADM
Raymond A Spruance
- TG 16.5
Carrier Group -- Capt. George D.
Murray
- Enterprise(CV)
-- Capt. Murray
- VF-6
-- 27 F4F-4
- VB-6
-- 19 SBD-2 and -3
- VS-6
-- 19 SBD-2 and -3
- VT-6
-- 14 TBD-1
- Hornet(CV)
-- Capt. Marc A
Mitscher(Promoted to RADM
en route to Midway)
- VF-8
-- 27 F4F-4
- VB-8
-- 19 SBD-2 and -3
- VS-8
-- 18 SBD-2 and -3
- VT-8
-- 15 TBD
- TG 16.2
Cruiser Group --RADM Thomas C.
Kinkaid (ComCruDiv6)
- New
Orleans(CA), Minneapolis(CA),
Vincennes(CA), Northampton(CA),
Pensacola(CA), Atlanta(CL)
- TG 16.4
Destroyer Screen -Capt. Alexander
D. Early (ComDesRon 1)
- 9 DDs
- Oiler
Group -- 2 oilers, 2DDs
SUBMARINES -- RADM R. H.
English, Commander, Submarine Force, Pacific, at Pearl
Harbor
- TG 7.1 Midway Patrol Group --
12 submarines
- TG 7.2 On roving assignment --
3 submarines
- TG 7.2 North of Oahu Patrol --
4 submarines
- MIDWAY SHORE-BASED AIR --
Capt. Cyril T. Simard
- Detatchment of PatWing
1 and 2
- 32 PBY-5 and
PBY-5A Catalinas
- VT-8
Detatchment -- 6 TBF
- Marine Aircraft Group
22, 2nd Marine Air Wing -- Lt. Col Ira L.
Kimes
- VMF-221 -- 20
F2A-3, 7 F4F-3
- VMSB-241 -- 11
SB2U-3, 16 SBD-2
- Detatchment of 7th
Army Air Force -- Maj. Gen. Willis P.
Hale
- 4 B-26, 19
B-17
- VMSB-241 -- 11
SB2U-3, 16 SBD-2
- MIDWAY LOCAL DEFENSES --
Captain Simard
- 6th Marine Bn
(reinforced), Fleet Marine Forces, Col.
Harold D. Shannon
- Motor Torpedo Squadron
1
- 8 PT Boats at
Midway, 2 at Kure, 4 small patrol
craft
- Deployed in area
- 2 tenders, 1DD
at French Frigate Shoals
- 1 oiler, 1
converted yacht, 1 minesweeper at
Pearl and Hermes Reef
- 2 converted
tuna boats at Lisianski, Gardner,
Pinnacles, Laysan, and Necker
- Deployed in area
Midway Relief Fueling Unit -- 1 oiler, 2
DDs
- FORCES IN THE ALEUTIAN
CAMPAIGN
- Task Force 8 -- RADM
Robert A. Theobald (in Nashville)
- TG 8.6 Main
Body -- 2 CA, 3 CL
- TG 8.1 Air
Search Group
- 3
tenders with 20 PBY of
PatWing 4; 1 B-17
- TG 8.2 Surface
Search or Scouting Group
- 1
gunboat, 1 oiler, 14 YP,
5 Coast Guard cutters
- TG 8.3 Air
Striking Group
- Ft.
Randall -- 21 fighters,
14 bombers
- Ft.
Glenn, Umnak -- 12
fighters
- Kodiak
-- 32 fighters, 5
bombers, 2 light bombers
- Anchorage
-- 44 fighters, 24
bombers, 2 light bombers
- TG 8.4
Destroyer Striking Group -- 9DDs
- TG 8.5
Submarine Group -- 6 submarines
- TG 8.9 Tanker
Group -- 2 oilers, SS Comet
Imperial Japan Navy ORDER OF BATTLE Midway
- MAIN BODY -- Admiral Yamamota
- BatDiv -- Yamatoflagship,
Nagato, Mutsu
- Carrier Group -- Honsho(CLV)
with 8 bombers; 1DD
- Special Force -- Chiyoda,
Nisshin (seaplane carriers serving
as tender)
- Screen (DesRon 3)
--RADM Shintaro Hashimoto
- Sendai
(CL, flagship)
- DesDiv 11 -- 4
DD
- DesDiv 19 -- 4
DD
- 1st Supply
Unit -- 2 oilers
- GUARD (Aleutians
Screening) FORCE -- VADM Shiro Takasu
- BatDiv 2 -- Hyuga
(flagship), Ise, Fuso,
Yamashira
- Screen
-- RADM Fukuji Kishi
- CruDiv
9 -- Kitakami (CL,
flagship, Oi (CL)
- DesDiv
20 -- 4DDs
- DesDiv
24 -- 4DDs
- DesDiv
27 -- 4DDs
- 2nd
Supply Unit -- 2 oilers
- FIRST CARRIER STRIKING FORCE
(1st Air Fleet) -- VADM Chuichi Nagumo
- Carrier Group -- VADM
Nagumo
- CarDiv 1
- Akagi
(CV, flagship) -- 21 Zero
fighters, 21 dive
bombers, 21 torpedo
bombers
- Kaga
(CV) -- 21 Zero fighters,
21 dive bombers, 30
torpedo bombers
- CarDiv 2 --
RADM Tamon Yamaguchi
- Hiryu
(CV, flagship) -- 21 Zero
fighters, 21 dive
bombers, 21 torpedo
bombers
- Soryu
(CV) -- 21 Zero fighters,
21 dive bombers, 21
torpedo bombers
- Support Group -- RADM
Hiroaki Abe
- CruDiv 8 -- Tone
(CA, flagship), Chikuma
(CA)
- 2nd Section,
BatDiv 3 -- Haruna, Kirishima
- Screen (DesRon 10) --
RADM Susumu Kimura
- Nagara
(CL), flagship
- DesDiv 4 --
4DD
- DesDiv 10 --
3DD
- DesDiv 17 --
4DD
- Supply Group -- 5
oilers, 1 DD
- MIDWAY INVASION FORCE (2nd
Fleet) VADM Nobutake Kondo
- Invasion Force Main
Body
- CruDiv 4 (less
2nd section)
- Atago
(CA, flagship), Chokakai
(CA)
- CruDiv 5 -- Myoko
(CA), Haguro (CA)
- BatDiv 3 (less
2nd section) -- Kongo, Hiei
- Screen (DesRon 4) RADM
Shoji Nishimura
- Yura
(CL, flagship)
- DesDiv 2 -- 4
DDs
- DesDiv 9 -- 3
DDs
- Carrier Group
- Zuiho
(CVL) -- 12 Zero fighters, 12
torpedo bombers; 1 DD
- Supply Group -- 4
oilers, 1 repair ship
- Close Support Group --
VADM Takeo Kurita
- CruDiv 7 -- Kumano
(CA, flagship), Suzuya
(CA), Mikuma (CA), Mogami
(CA)
- DesDiv 8 -- 2
DDs
- 1 oiler
- Transport Group --
RADM Raizo Tanaka
- 12 transports
carrying troops
- 3 patrol boats
carrying troops
- 1 oiler
- Escort -- RADM Tanaka
- Jintsu
(CL, flagship)
- DesDiv 15 -- 2
DDs
- DesDiv 16 -- 4
DDs
- DesDiv 18 -- 4
DDs
- Seaplane Tender Group
-- RADM Ritutaro Fujits
- Seaplane
Tender Div 11
- Chitose
(CVS) 16 fighter
seaplanes, 4 scout
seaplanes
- Kamikawa
Maru (AV) 8 fighter
seaplanes, 4 scout
seaplanes
- 1 DD,
1 patrol boat carrying
troops
- Minesweeper Group
- 4 minesweepers
- 3 submarine
chasers
- 1 supply ship
- 2 cargo ships
- NORTHERN (Aleutians) FORCE
(5th Fleet) VADM Moshiro Hosogaya
- Northern Force Main
Body
- Nachi
(CA, flagship)
- Screen
-- 2 DDs
- Supply
Group -- 2 oilers, 3
cargo ships
- Second Carrier
Striking Force -- RADM Kakuji Kahuta
- Carrier Group
(CarDiv 4)
- Ryujo
(CVL, flagship) -- 21
Zero fighters, 21 dive
bombers
- Junyo
(CV) -- 24 Zero fighters,
21 dive bombers
- Support Group
(2nd section, CruDiv 4) -- Maya
(CA), Takeo (CA)
- Screen (DesDiv
7) -- 3 DD, 1 oiler
- Attu Invasion
Force -- RADM Sentaro Omori
- Abukuma
(CL, flagship)
- DesDiv
21 - 4 DDs
- 1
minelayer
- 1
transport carrying troops
- Kiska Invasion
Force -- Capt. Takeji Ono
- CruDiv
21 Kiso (CL), Tama
(CL), Asaka Maru
(auxillary cruiser)
- Screen
(DesDiv 6) - 3 DDs
- Minesweeper
Div. 13 -- 3 minesweepers
- 2
transports carrying
troops
- Submarine
Detatchment -- RADM Shigeaki
Yamazaki
- SubRon1
-- I-9 (flagship)
- SubDiv
2 -- 3 submarines
- SubDiv
4 -- 2 submarines
ADVANCE (Submarine) FORCE (6th
Fleet) VADM Teruhisa Komatsu
- Katori (CL, flagship)
at Kwejalein
- SubRon 3 -- RADM Chimaki Kono
- Rio de Janeiro Maru
(submarine tender, flagship) at Kwejalein
- SubDiv 19 -- 4
submarines
- SubDiv 30 -- 3
submarines
- SubDiv 13 -- 3
submarines
- SHORE-BASED AIR PATROL (11th
Air Fleet) VADM Nishizo Tsukahara at Tinian
- Midway Expeditionary
Force -- Capt. Chisato Morita
- 36 Zero
fighters (aboard Nagumo's
carriers)
- 10 land-based
bombers at Wake, 6 flying boats
at Jaluit
- 24th Air Flotilla --
RADM Minoru Maeda at Kwajelein
- Chitose Air
Group -- 36 Zero fighters, 36
torpedo bombers at Kwajelein
- 1st Air Group
-- 36 Zero fighters, 36 torpedo
bombers at Aur and Wotje
- 14th Air Group
-- 18 flying boats at Jaluit and
Wotje
Battle of Midway Casualties
By the time the battle of Midway ended, 3,057 Japanese
had died. The four carriers sunk and their casualties
were: Akagi: 267; Kaga: 811; Hiryu: 392; Soryu: 711; a
combined total of 2,181.[97] The heavy cruisers Mikuma
(sunk): 700; and Mogami (badly damaged): 92; between them
took a total of 792 casualties.
In addition, the destroyers Arashio (bombed): 35; and
Asashio (strafed by aircraft): 21; were both attacked
while escorting the damaged heavy cruisers. Floatplanes
were lost from the cruisers Chikuma: 3; and Tone: 2. Dead
aboard the destroyers Tanikaze: 11; Arashi: 1; Kazagumo:
1; and the fleet oiler Akebono Maru: 10; make up the
remaining 23 casualties.
Credits: US Navy History Center
|
Midway Battle
in the Pacific was one of the most important
naval battles of World War 2. Between 4 and 7
June 1942, only six months after Japan's attack
on Pearl Harbor, and one month after the Battle
of the Coral Sea, the United States Navy (USN),
under Admirals Chester W. Nimitz, Frank Jack
Fletcher, and Raymond A. Spruance decisively
defeated an attack by the Imperial Japanese Navy
(IJN), under Admirals Isoroku Yamamoto, Chuichi
Nagumo, and Nobutake Kondo on Midway Atoll,
inflicting irreparable damage on the Japanese
fleet. Military historian John Keegan called it
"the most stunning and decisive blow in the
history of naval It was Japan's first naval
defeat since the Battle of Shimonoseki Straits in
1863.
|
|
| |
 |
|
| |
 |
|
| |
Turn-based WW2
naval game, extension to the classic
Submarine game (Battleship game) where
ships/planes/subs can move. Contains plenty of
game missions, game campaigns and 40 ship,
submarine, airplane ana port artillery types,
with combat maps up to 96X96 large. |
|
| |
|
|
| |
 |
|
| |
 |
|
| |
Turn-based space
strategy game represents World War 4
conflict on tactical level.
The user-friendly game engine allows more than 60
unit types, including planet battleships, galaxy
cruisers, death-stars, stealth units, star
destroyers, air-space interceptors, explorers,
planet artillery and radars. |
|
| |
|
|
| |
|
|
| |
 |
|
| |
Tycoon Strategy
Game - build your own world business empire as an
arms dealer tycoon. Travel around the world,
trade with more than 400 weapon systems, hire
secretaries, bodyguards, lawyers, fighters and
tanks, establish companies and search for
criminals and hostages. |
|
| |
On 10 June, the Japanese Navy
conveyed to the military liaison conference an
incomplete picture of the results of the battle.
Chuichi Nagumo's detailed battle report was
submitted to the high command on 15 June. It was
intended only for the highest echelons in the
Japanese Navy and government, and was guarded
closely throughout the war. In it, one of the
more striking revelations is the comment on the
Mobile Force Commander's (Nagumo's) estimates:
"The enemy is not aware of our plans (we
were not discovered till early in the morning of
the 5th at the earliest)." In reality, the
whole operation had been compromised from the
very beginning due to Allied code-breaking
efforts that would crucially disadvantage future
Japanese operations throughout the war.
The Japanese public and much of the military
command structure were kept in the dark about the
extent of the defeat: Japanese news announced a
great victory. Only Emperor Hirohito and the
highest Navy command personnel were accurately
informed of the carrier and pilot losses.
Consequently, even the Imperial Japanese Army
continued to believe, for at least a short time,
that the fleet was in good condition.
On the return of the Japanese fleet to
Hashirajima on 14 June the wounded were
immediately transferred to naval hospitals; most
were classified as "secret patients",
placed in isolation wards and quarantined from
other patients and their own families to keep
this major defeat secret. The remaining officers
and men were quickly dispersed to other units of
the fleet and, without being allowed to see
family or friends, were shipped to units in the
South Pacific, where the majority were killed.
None of the flag officers or staff of the
Combined Fleet was penalized, with Nagumo later
being placed in command of the rebuilt carrier
force.
The Japanese Navy learned some lessons from
Midway: new procedures were adopted whereby more
aircraft were refueled and re-armed on the flight
deck, rather than in the hangars, and the
practice of draining all unused fuel lines was
adopted. The new carriers being built were
redesigned to incorporate only two flight deck
elevators and new firefighting equipment. More
carrier crew members were trained in
damage-control and firefighting techniques,
although the losses later in the war of Shokaku,
Hiyo, and especially Taiho suggest that there
were still problems in this area.
Replacement pilots were pushed through an
abbreviated training regimen in order to meet the
short-term needs of the fleet. However, this led
to a sharp decline in the quality of the aviators
produced. These inexperienced pilots were fed
into front-line units, while the veterans who
remained after Midway and the Solomons campaign
were forced to share an increased workload as
conditions grew more desperate, with few being
given a chance to rest in rear areas or in the
home islands. As a result, Japanese naval air
groups as a whole progressively deteriorated
during the war while their American adversaries
continued to improve. |
|
|